
Another year is coming to an end. As usual, the Christmas is over and has left behind just few days for the New Year and at this point whether you are having a quiet evening with your family at home or hosting a fun filled party, you surely have to find some inspiration for the kids for the coming New Year’s Eve.
Spending your New Year with kids can bring a lot of fun. There are a lot of games and activities you can organize with kids on the eve which kids will love helping to count down to the New Year.
Everyone loves New Year as it prompts to think about what changes one can make in their life.
Here are some of the ideas which you can make for the coming New Year for kids. In some of the ideas, you can even include kids in the making process so as to increase their DIY skills.
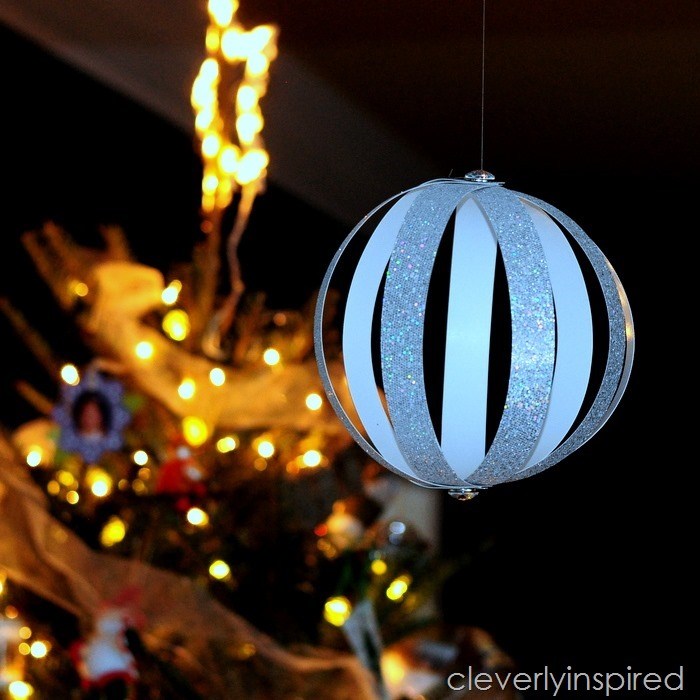
DIY New Year’s Eve Ball: Your kids will love the sparkly New Year’s Eve Balls. Simply cut glitter papers in strips and tie them at the top and bottom, fan them out and hang them around the house.
To make one ball, you will need:
Sparkly Paper: 1 piece, 12 by 12.
Brads or Paper Fasteners: 2.
Rolling Cutter or Scissors.
Ruler.
Hole Punch.
Thread for Hanging.
Directions:
Cut 8 strips of about 1 inch each.
Punch the hole at top and bottom on the strip of paper.
Gather the top using a fastener.
Gather the bottom using a fastener.
To create a ball shape, fan strips out.
Using a fishing line or thin string, hang it from the light or ceiling.


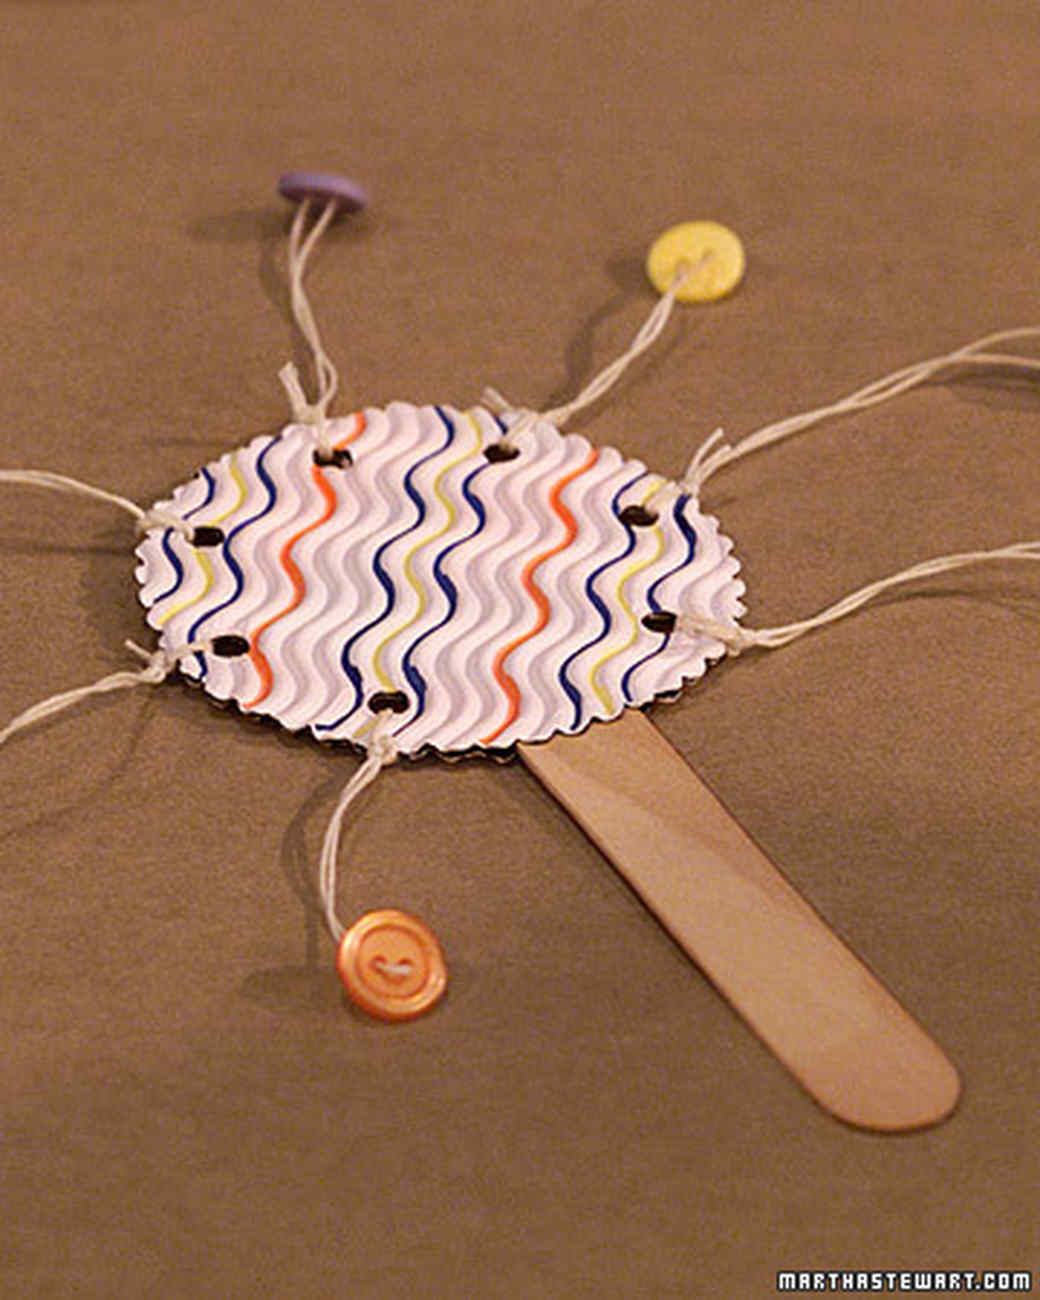
Noise Makers: The DIY noise makers are the perfect craft ideas for your noisy kids for the New Year count down. Let your kids customize their own noise maker and allow them to make some noise during the countdown. Even your guests can take the colorful crafts as a take away. For this idea, you will need:
Scissors.
Kraft Paper or a Cardboard.
Markers.
Craft Glue.
Ice Pop Stick or a Tongue Depressor.
Hole Punch.
Waxed Twine.
Beads or Buttons.
Directions:
Cut 2 identical circles from kraft paper or a cardboard using scissors or decorative edges.
Decorate one side of each circle using a marker.
Using a craft glue, stick the two pieces together, sandwiching an ice pop stick or a tongue depressor in between the pieces for making a handle.
Make holes around the edge of the cardboard circle using a hole punch, about 1 inch apart. Thread 3 to 5 inch lengths of waxed twine with buttons or beads and tie the free end to the holes.


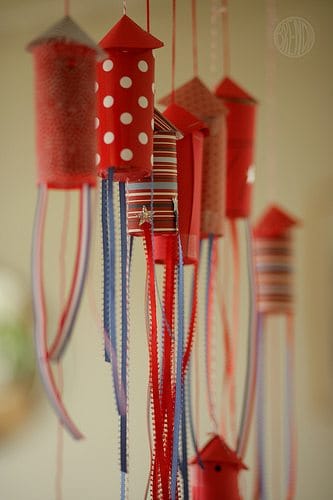
DIY Confetti Poppers: The Confetti Popper rockets are the perfect ideas for your kids to blow stuff up inside without any fire hazard. The confetti is in the trapdoor which is further attached to a string and the confetti comes out streaming for an innovative twist on a confetti popper when pulled. You can make it for your kids or assist them in decorating the poppers. Now you can have fireworks within the house without ever catching anything on fire. It is explosive, yet safe.
You all must have seen paper rockets before but this rocket has a trap door in the bottom and when you pull the string, it dangles and the small compartment open up and a tiny bucket full of confetti lands on the head. It’s a perfect idea to show your creative skills. To make this, you will need:
Paper Towel or Toilet Paper Tubes.
Colored Paper.
Tissue Paper.
Confetti.
String or Bakers Twine.
Tape.
Glue.
Beads.
Ribbons for Steamers.
Stapler.
Scissor.
Needlework Needle.
Fun Craft Punches for Confetti.
Hole Puncher.
Directions:
Get a square of tissue paper, big enough to cover the cardboard tube’s bottom, across 3 inches. From a sheet of card stock, cut a small disc that fits within the radius of the cardboard tube. To the center of the tissue paper attach the disc with some glue and let it dry for few minutes. On the craft needle, thread about an arm’s length of twine and tie a bead to the end for a knot. Once done, puncture the center of your disc which is attached to the paper. This becomes the trap door.
Glue the tissue paper trap door to the cardboard tube with a small line of glue around the tube’s bottom making sure to attach it with the bead side inside the tube and the string side hanging outside of the tube. You can let it hang or can add a pull tab to your long dangling fuse. You can also add stars. Allow it to dry and then you are done with that part. Now get on to decorating.
You will find many ways to decorate your rocket but the most important part is to cover the tube with decorative paper so that no one gets to see that it is a toilet paper roll or paper towel tube. The decorative sheet holds the tissue paper trap door on or at least covers the ruffles of tissue where it is glued to the tube. You can attach ribbons to the bottom inside of the decorative covering so that the rockets look like they are flying.
Roll the paper around the tube and staple for strength at the top. You cannot staple the bottom because the tissue paper trap door keeps the stapler from getting inside.
Once done, fill the tube with confetti. It is totally up to you whether you want to fill handful of it or load it up.
Attach the cone to the top of your rocket. It is little tedious but it will look aesthetic.
To make the cone, cut the circle of about 3.25 inches wide across then cut one snip all the way to the center of the disc. Take the edges of the cut and pull them together for about half an inch or more. Once your cone reaches a desirable height, staple it at the base. Now to attach the cone to the rocket, you need to create a strong holder which can be used to hang your rocket from. It is important that the rockets hold together and doesn’t crash down on your head instead of releasing the payload of confetti, since the rockets will be tucked upon. An easy way to string the cone is to open up the stapled cut from inside of the cone and pull the string through the gap.
Now you can hang it up and let the festive time begin.
To ensure that you get maximum explosiveness, simply poke some small holes around the bottom of the trap door but do not cut it completely out because the ripping sound of the trap door being yanked is the biggest part of the fun.


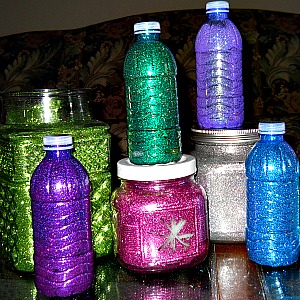
Noise Maker Bottle: The recycled bottle noise makers are the perfect way to get everyone in the celebration mode for the New Year. It’s fun to make because you will be having most of the items in hand. Simply add some colorful sparkle to the old bottles and place some noise makers inside and seal the lid to make some noise makers to welcome the New Year in style.
For this fun idea the things you will need are:
Mop and Glo (It will work as a Glitter).
Extra Fine Glitter – Various Bright Colors.
Empty Plastic Water Bottles with Lids.
Rice, Tiny Bells, Glass Beads, Small Rocks.
Directions:
Pour some Mop and Glo in the water bottle, over the sink or a large bowl, cover it up with the lid and swirl the cleaner around the inside of the bottle to cover the inside surface including the top of the lids.
Once done, remove the lids and shake a good amount of glitter in the water bottle and turn the bottle around shaking the glitter in all over the Mop and Glo.
You can put the lids back on to get some glitter on the inside of the lid tops, if you want.
Allow the glitter to dry inside which will take few minutes.
Now add the noise makers in the glittered water bottles and seal the lid.
Your noise maker is now ready to rock the party.


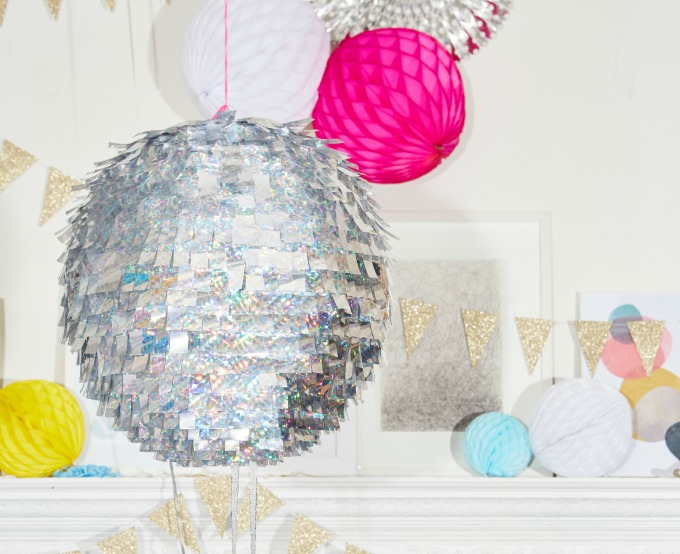
DIY Disco Balls: The DIY disco ball is the simplest idea on the list which lets your kid to show off some DIY skills when you are outing and your kid is enjoying with friends in the house.
For this décor idea, you will need:
Paper Lantern: 16 inches.
Holographic Bird Tape.
Tape or Glue.
Length of Ribbon.
Directions:
Cut 20 bird tape of 2 feet length and fringe them every 1½ to 2 inches.
Once done, start attaching them to the paper lantern by expanding the paper lantern and starting from the bottom by attaching one fringed length of the bird tape with glue dots or tape and wrap it around the lantern. Make sure it overlaps the ends and trim off the excess. You will have to add few more glue dots or tape as you wrap the strip of bird tape.
Repeat but make sure that the row above hangs over the row below it.
At the top for hanging, attach a length of ribbon.


Sparkly Cup Cakes: Its New Year party time and nothing is complete without foods and desserts. On this New Year party at your home, create some homemade cup cakes with your kids and welcome your Guests and the New Year with some taste. This can be a perfect idea for New Year party for kids. Let your kid and the groups fill their champagne glass with candies and cupcakes. It is better than some boring sparkling juice which they have been drinking almost every year.
For this idea, you will need:
Cupcakes and Frosting.
Candies.
Plastic Champagne Glasses.
Fun Topper.
Directions:
Bake and frost the cupcakes first and fill up your champagne glasses with a small amount of candy until it covers the stem and the bottom of the glass. On top of candy, set the cupcake and top it up with some fun toppers of your or kid’s choice.
Quick and the simple idea is ready. The kids will love having their own adult glasses in the party.
DIY Photo Booth Printable: A personal photo booth in the party is the biggest fun. You can use glittery paper or bright colors so that the final result amazes your Guests and the kids. This activity is sure to keep your kid occupied for a while. Capture the last moments of the current year in a fun way with the DIY Photo Booth Props. Your kids will love cutting and tracing out the pieces. This simple craft idea can provide hours of entertainment during the party festivities. Even the adults in the house will love posing with the props for few photos. No one in the house can resist the idea of posing with some fun props.
For this fun idea, you will need:
Card Stock.
Pencil.
Scissors.
Paper Straws.
Stapler.
Printable Templates.
Directions:
Save the templates on your PC or a Laptop and get print outs of each and cut out the template pieces.
Use the pieces to trace the photo props on the card stock.
TIP: Trace on the back of the card stock as it will keep pencil marks off the front of your props and make it easier to see the lines.
Once the pieces are traced, cut them out from the card stock.
Using a stapler, staple each prop to a paper straw. Pinch the top of your straw to make things easy for you.
Have fun with the homemade props but make sure you do not forget to smile.
Fireworks Ring: The firework rings are the best option for the kids to make this season to welcome the New Year in some stylish way. All you need is some sparkly pipe cleaner. You can change the color of the pipe cleaners too for multicolored fireworks.
You can use Silver and Red tinsel stems. Take 3 whole stems and cut them in half to make 6 pieces of equal length.
To make a ring, collect 5 stems and fold them in half. Make sure to leave a circle to fit in the child’s finger then wrap the 6th stem around it a few times to secure the ring making sure the ends lay flat so they do not poke the child’s finger.
To make the loose ends face up, turn the ring. Bend them slightly in the shape of a burst of fireworks. Make sure to leave the stems raised enough so they do not poke in the child’s hand.
Repeat and make the fireworks rings in all the favorite colors for this coming season.


Paper Plate Party Animal: Let your kids create their own paper plate monster with a party blower tongue. This will work as silent party blowers to use which will keep the elders happy. Help your kids to choose from different colors for their monsters. To make this, you will need:
Paper Plate: 1.
Light Blue and Yellow Paint.
Large Pink Pom Poms: 2.
Scrap of Black Felt.
Party Blower.
Directions:
Take a paper plate and paint the back with light blue and the top with yellow and leave it to dry.
From the black felt, cut circles and glue it to pink pom poms. Fold the plate in half without creasing.
Glue the pom pom eyes to the top of the blue side of the paper plate.
In the center of the paper plate, cut a small hole and insert the party blower.
Secure the blower with some hot glue or tape.
These are some of the latest idea which you can try this season for the party and festivities. Use your own ideas and mix up the things to get something new.
HAPPY NEW YEAR!