Hello folks!
The time just flies away in a jiffy! I can’t believe we are already heading towards the third month of the year and April is not too far away either. Springtime is just around the corner and it’s high time to upgrade your wardrobe and vanity for fresh, Summery colours.
The month of April and the festivities of Easter give you yet another reason to bond with family, relish some great food and pamper yourself, as well. If you are lucky enough to have a day or two off around the time of Easter, why not utilize all those nail paints lying around idle in your vanity and give yourself a cute manicure. Let us explore some fun , vibrant and east to do Easter-inspired nail arts below, in this article. Get inspired from all of the symbols that signify Easter such as: Easter eggs, bunnies, chickens, and so on..
Nail Arts For Easter
1 Easter Bunny Accent Nail


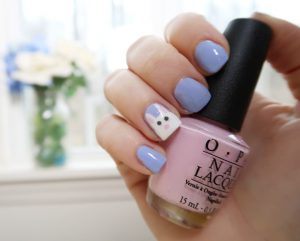
I will start with my personal favourite, The Easter bunny Accent nail art. I love this one for it’s sheer simplicity and all you have to do to turn it instantly into a regular manicure is to wipe off the polish from just one nail and put a fresh coat of colour.
Here are the steps:
- Start by wiping off any residues from old nail polish.
- You can cut, shape and file your nails, as per your personal preference. Flat edges work the best for this nail art.
- Next, apply some cuticle oil to soften your cuticles. It is important to nourish your nails.
- Then, use any Pastel coloured nail paint of your choice to paint your nails. Glossy and Shimmery shades do not work too well for this nail art.
- Quick dry nail polishes are always prefered. Let the first coat dry out.
- For the accent nail, paint the upper half with White and lower half with Pastel colour.
- Apply at least two coats for a good dose of colour. Let the second coat dry completely.
- Now, Use a White nail art pen or a Fine brush dipped in Opaque, White nail enamel to properly define a semi-circle. The base of the semi-circle rests on the edge of your nails.
- The bunny ears can be easily made with help of triangular shapes. Just keep them a bit long to resemble a bunny’s ears.
- A dotting tool dipped in Black nail colour can be used to depict the eyes of the bunny.
- Make sure you are keeping a cup of Acetone and cotton to handy to clean your brushes regularly.
- If you do not have a dotting tool, you may use a toothpick as well.
- Draw the nose and details of ears with a Pink toned nail polish.
- Once dry, seal everything with a clear, top coat.
2 Bunnies and Flowers


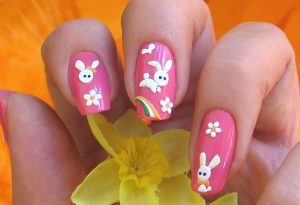
This nail art is for you if you have good drawing skills. You would need to have dotting tools, nail art brushes and few colours of your liking.
Here are the steps:
- Paint the base of nails in a bright Pink nail paint.
- Use dotting tools dipped in various colors to draw flowers and bunny figurines.
- You can add interesting details like: bows, Polka dots, rainbows etc in your nail art.
- Protect everything with a clear, nail paint.
3 Polka Dots with a bunny accent nail


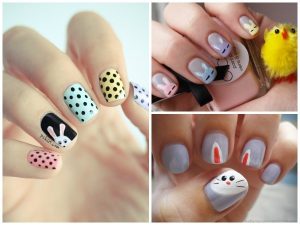
If you want to be playful, you can paint each nail in a different colour or you could use a single colour to polish all the nails.
Here are the steps:
- Use Black or White nail paint to put the dots. Try to keep the pattern uniform for a neat appearance.
- The bunny can be painted in a similar way as explained in nail art number 1. While drawing the head, make sure you leave enough space around for drawing the years.
- Don’t worry if your basic figure is a little streaky at first.
- Once dry, you can go over the patchy areas again to build up a solid colour.
4 Cracked Eggs Nail Art


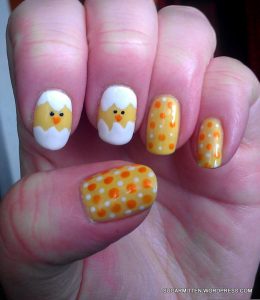
This one is super easy to create and barely takes five minutes.
Here are the steps:
- Paint your nails with bright Yellow nail polish.
- Next, use a paint brush to draw the cracked egg shells.
- The eyes and pointy nose of the chickens can be drawn with dotting tools or with brush itself.
- With some basic drawing skills, you can totally master this cute nail art comprising of baby chicks.
- Seal everything with a clear, top coat. Make sure you gently dab rather than drag the brush on your art!
- Now you can draw these hatched eggs on one, two or all of your nails. It is totally up to you how many nails you choose to decorate with these cutesy chicks.
5 Decorate your nails like Easter Eggs


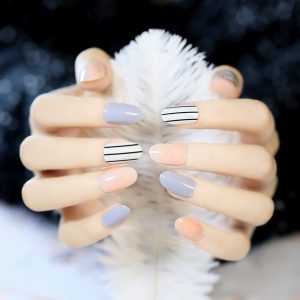
If you happen to have curved or Oval shaped nails, this idea would surely work for you. You may decorate your nails like Easter eggs! The options to play with are endless and these look edgy and adorable.
Here are the steps:
- You may use nail art tapes to create beautiful striped or Chevron pattern. If you choose stripes, they can be horizontal, vertical or even diagonal. The choice of tapes could be metallic or matte.
- Sponges may be used to create pretty ombre, marbled appearance.
- Geometric or block patterns can be put to use.
- You can also put nail art stickers to use for creating beautiful effects.
- Last but not the least out of the nail arts to decorate the nails is to do speckled egg-inspired manicure. You can spray specks of Black nail polish using a toothbrush
Whichever option you choose, do not forget to seal with a protective top coat. To remove the stray nail polish from around the edges of your nails, use a small eyeshadow brushes dipped in nail paint remover. This should help to give you a really neat, professional quality finish!
Source: